
Where to find:
Access the Manual Sample Entry screen via the Menu located in the top-left corner of the screen.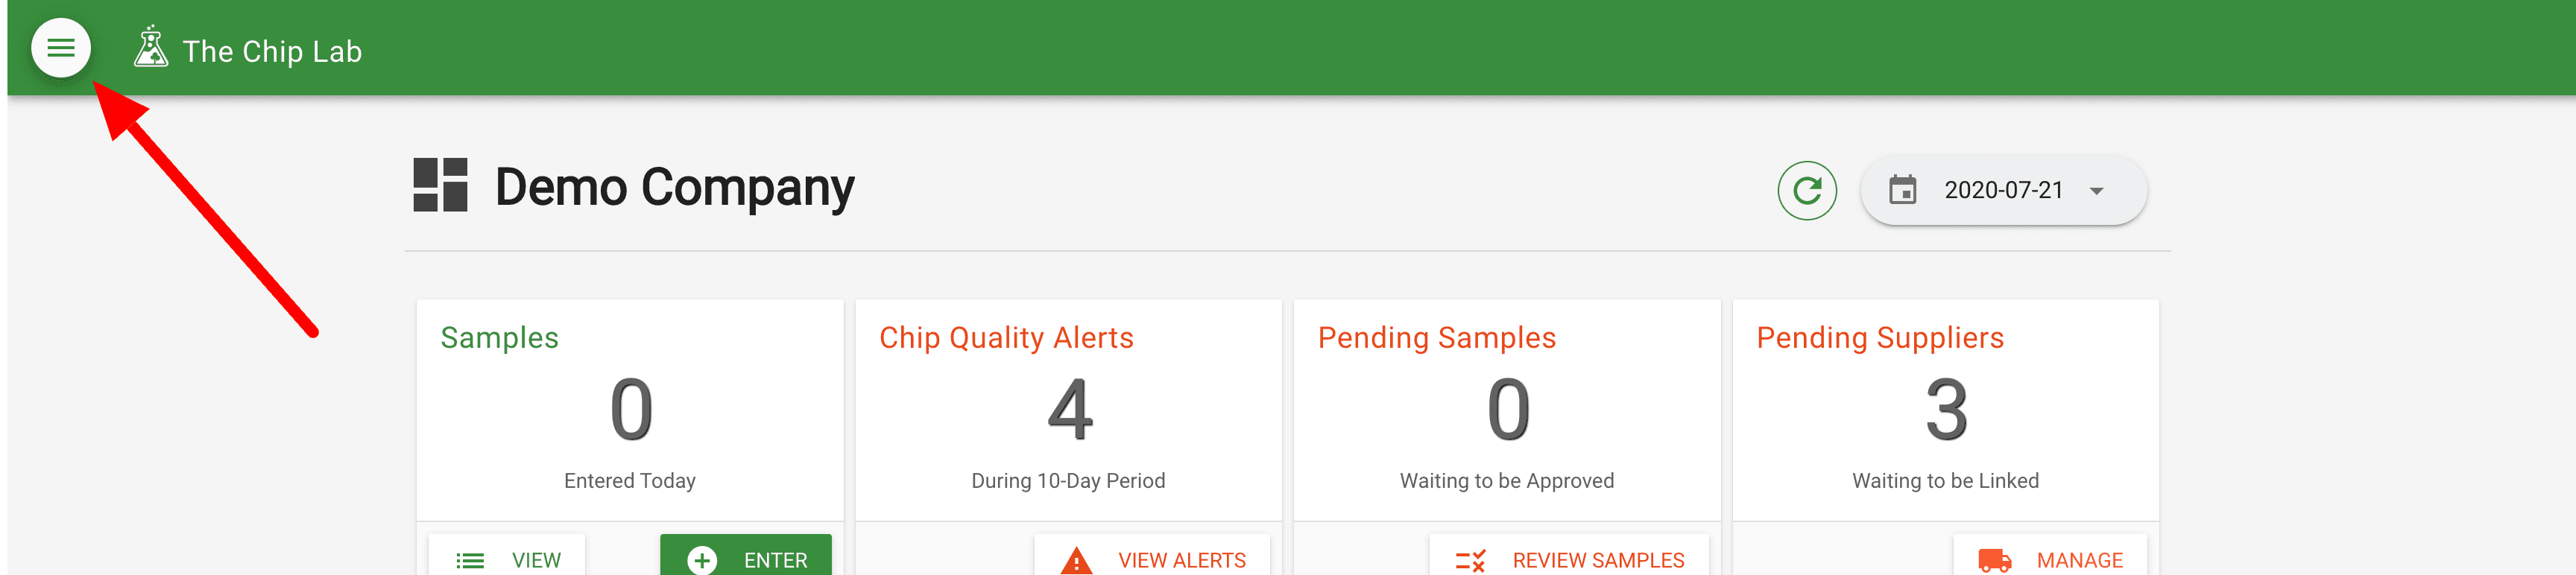
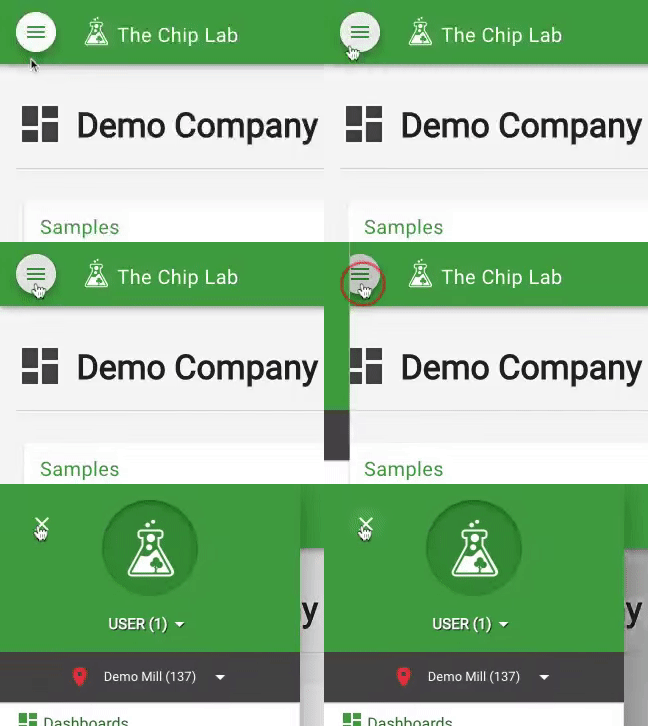
Locate and press the Enter Samples menu item (see below).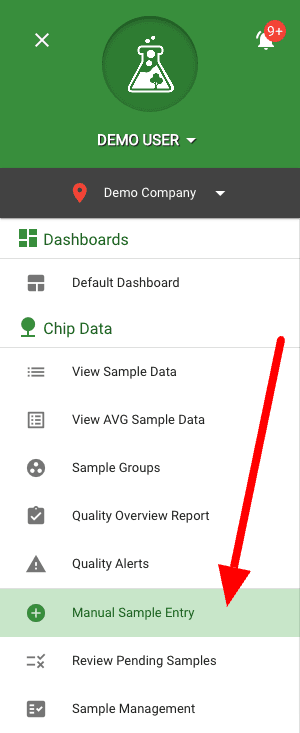
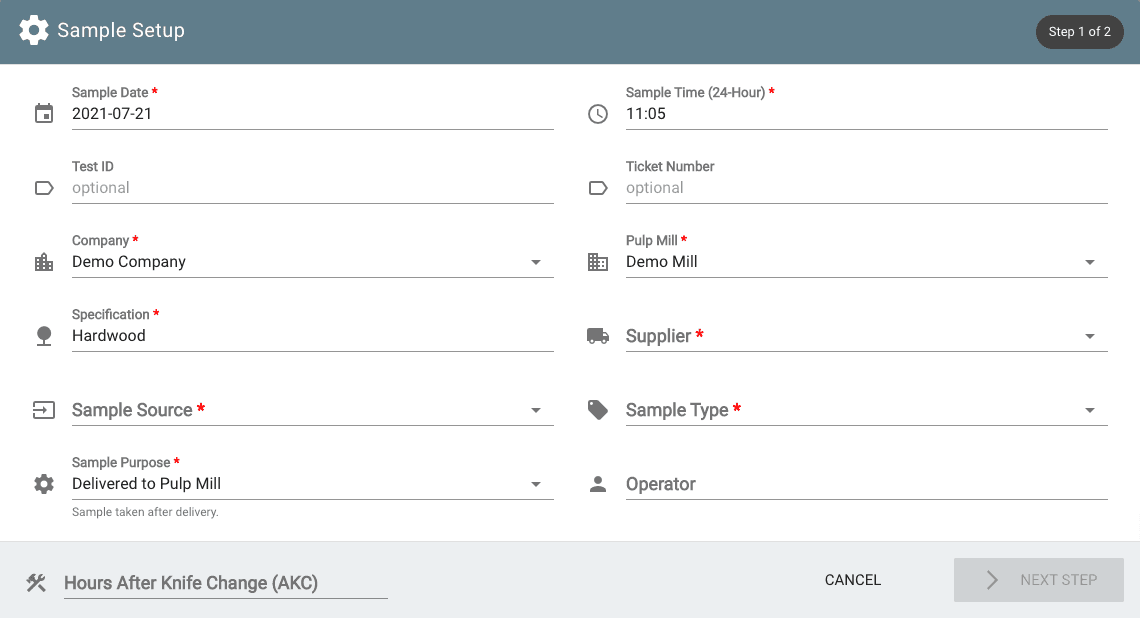
Step 1 - Sample Setup
The Manual Sample Entry screen should now be visible. It will automatically initialize many of the fields. Adjust field values as needed and be sure to select a Supplier before continuing to Step 2.
Note: Samples are required to be unique by: Specification (species), Supplier, and Sample Date + Sample Time.
Step 2 - Sample Data Entry
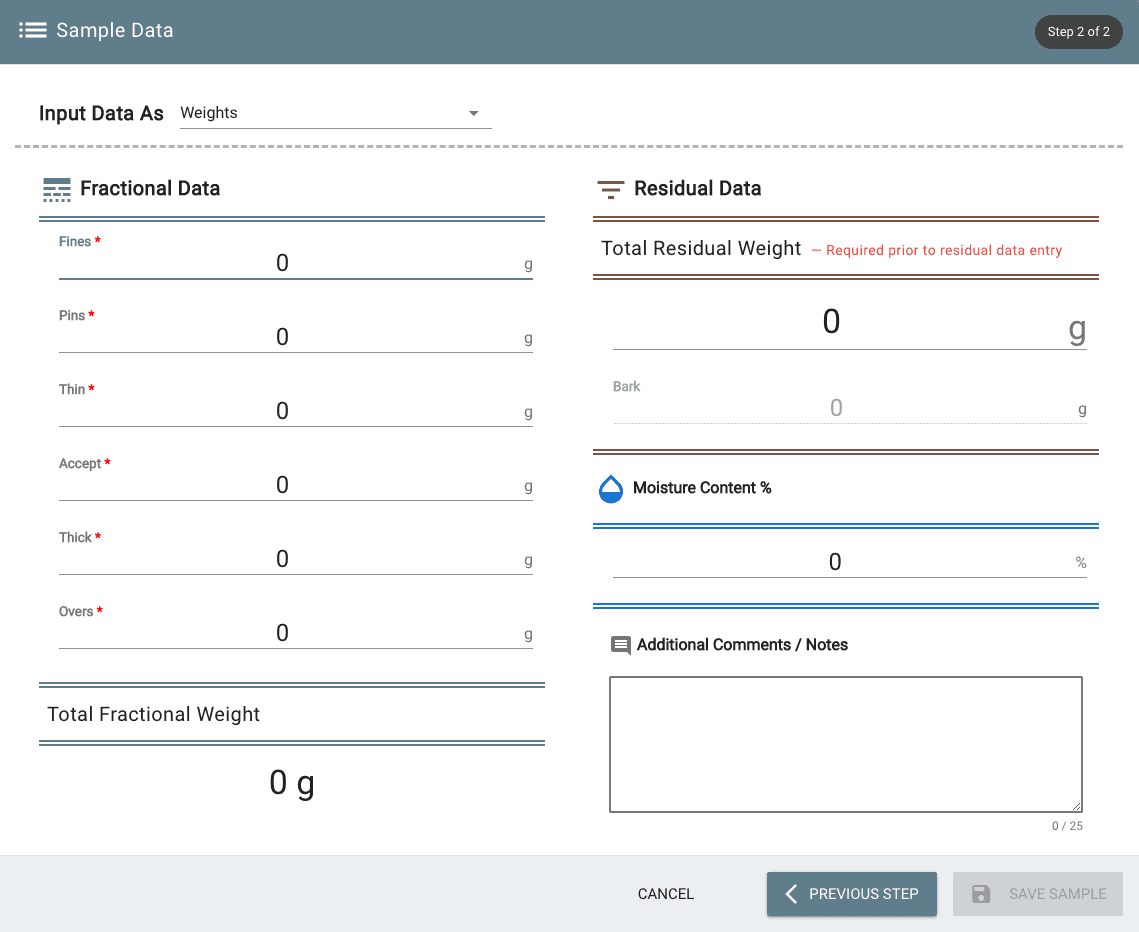
The Sample Data Entry section is broken down into multiple sections:
- Fractional Data
- Residual Data
- Moisture Content
- Additional Comments / Notes
Start by selecting your Input Data As value - which can be either Weights or Percentages.
Note: The "Input Data As" value is initialized to the default value configured on the Pulp Mill and can be configured to either weights or percentages.
Entering data as weights will automatically calculate Total Fractional Weight as fractional data is entered. It will also initialize the Total Residual Weight value, which will adjust as residual data is entered.
Entering data as percentages will require the Total Fractional Weight and Total Residual Weight values to be manually entered.
Fractional Data
Sample fractions are configured based on the selected Specification value in step 1. Typically there are six fractions but any number (up to seven) can be configured for a given specification.
Note: Fraction labels can be overridden if a machine center has been configured for the selected supplier. The machine center's tray labels will be used instead of the labels configured on the specification.
Residual Data
Bark, Knots, Residue, Rot, and Slivers are the available residual values that can be entered in this section. Their visibility is configured via the selected Specification value in step 1.
Moisture Content
Moisture data can be entered here as a percentage.
Additional Comments / Notes
Use this section to attach relevant comments or notes to this sample.
Once your sample is completely entered, you should see one of the two buttons available at the bottom of the screen.
The Save Sample button will create the new sample and immediately be available in live datasets.
The Save & Hold button will create the new sample but flag it as pending in the database.
This will require a review prior to being placed into live datasets.
This will not appear on any reporting or alerts.